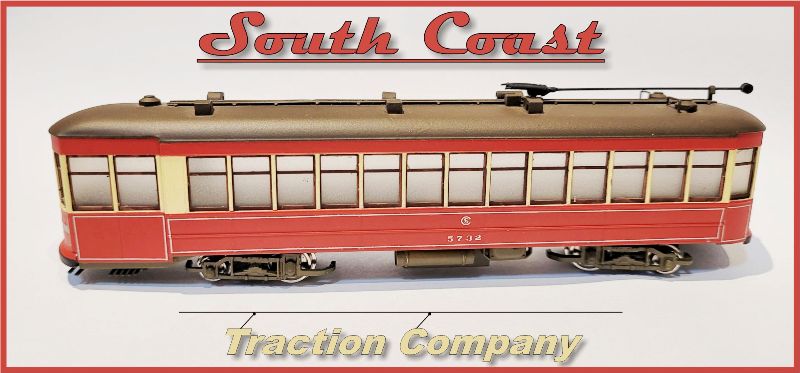
Saturday, January 24, 2026

Post #28

I have been able to make this post with thanks to a friend Kevin, a United aircraft engineer who was recently posted for a few weeks on a work roster. During his time there he was able to have a look around in free time and one of the visits was to the St. Kilda Tram Museum. My last trip to Adelaide the capital of the state of South Australia was possibly 50 years ago when all I had was a trusty Bolex 8mm movie camera. The results of this trip are in the big pile of movie film yet to be sorted out one day.

Adelaide - photo Kevin Waid
 
1950's electric tram network - Wikipedia

 Back in the 70's all that existed of the tramway network was a line that ran from the city to the bayside city of Glenelg. A lot of the line was in reserved track and the main infrastructure was a flyover of the main railway line. Any only the H type cars painted silver with red lining were running. But the foresite of retaining this section of tramway later led to extensions through the city to other locations. The H cars have all gone from the main system replaced by more modern units.

I am not familiar with where the following Kevins photos were taken so just enjoy them.


Virtually every capital city and various regional towns in Australia have either light railways or museums for viewing electric traction. And not forgetting the city of Melbourne that never abandoned their immense system, you could spend a lot of time travelling over it.
 Another location Kevin went to was the St. Kilda Tramway Museum, ironically at St. Kilda. It has certainly come a long way since my last visit, again I will put up a selection of his photos. Amongst the Adelaide trams there are also examples from Melbourne, Sydney and Ballarat a regional Victorian town.


 And to top it all off Kevin brought back a gift of some items they had for sale. They were two different types of employees metal passes and possibly buttons maybe off a jacket. On the metal passes the initials MTT appear that stood for the Municipal Tramways Trust the company that were responsible for operating the tramways. Established in 1906 that company lasted until December 1975 and then operated as the State Transport Authority. As they say out here: "They are going straight into the pool room" (A quote from the movie The Castle)


 I have been doing some model work on the layout, not a lot at this time but just some scenic work around the trolley stop, a fence has been erected to stop passengers falling down onto the floor. I feel as if I am working on a colouring in book, slowly chipping away to get it all finished. So here are a few photos of the progress:


Until next time..........
 

Sunday, January 4, 2026

Post #27

Hi and welcome to 2026. It was last year some time that I did my last posting so we are due for an update.

The first blog was dated March 2024 so it won't be long before it has been two years since I have gone back to traction world. In some of the earlier blogs I revealed how I am revisiting traction modelling again. It seems every layout I get involved with becomes 'my last layout ever' but I seem to prove that wrong. I guess the desire for creativity overpowers longevity. I have enjoyed every layout built in the past and can only hope that my modelling skills have improved along the way.

So after a year or so I have been collecting ideas, research material, obtaining models, importing the required overhead wiring hardware from the states. I have only five books (currently) on electric traction including the two inspirational books - The Time of the Trolley and The Interurban Era, both William D Middleton books. My original copies from fifty years ago have long gone, hopefully someone else has been enjoying them.

The tilting baseboard has been assembled and is armed with a leg in each corner to prevent accidental turning. I don't want that yet as there is too much crap on top and would all end up in a pile on the floor. Some track has been laid, the depot has track in it although the sides and roof are yet to come (another day). Buildings have been sourced, I have assembled one and the others are patiently waiting in their boxes for their day on the layout. When I spot something on the web that might work on the layout I obtain it if I am quick. My bargain so far was ten trams for $50 which included the brass Brill four wheel sprinkler car.

One corner of the layout has been cut away to form a part river and will be my interpretation of the Aurora terminus. I am still looking for plans of the platform shelter.

Fan trip to South Aurora
 The trolleys are still away having their DCC decoders fitted and the track is not ready yet so no rush with that. I am tossing up whether to obtain one of the new Rapido Toronto cars being released. When you start adding up exchange rates and postage and other dreamed up government taxes, it will be a later decision. But when you consider what you now get in a model, it is very tempting.

When setting priorities it should be obvious that you get the track laid first. I have obliged this in a few areas but the temptation to do some scenery work comes in strong. I feel that this is what brings a layout to life and I am happy with the small amount done so far. The photo above show the river scene done so far and I was looking for another area to try some work.

Location of work area
The above diagram shows where I chose to do some more scenery work. In previous plans the boxed section was to have been a roadway but the chance to have some double track right of way proved stronger. I also wanted to have a trolley stop, this not only adds operation interest by having to stop there for passengers but will serve a few houses that will reside on the right hand side of the stop. At this end of the baseboard the board has been raised around 20mm to get away from the flat earth policy. The climb is very gradual and in typing this I have come up with the location name 'Hill End' Indeed that is the name of a town in outback New South Wales.

The track through this section is Peco code 75 flexible track, chosen for its finer appearance that the code 100 track. The rail head is smaller as well as the height. It has easily been curved to an eleven inch radius curve to accomodate the Electroliner.


As can be seen in the top photo the track crosses a single industry line via two 90 degree crossings, these were Atlas code 83 as they don't make the 90 degree ones in code 75. A bit of filing will see them sit OK.
The platforms were made with some thin cork. I painted the rail head with some water colour and then laid the cork over the rail. This then gave an accurate 'where to cut' guide. I have used this method in the past ventures. The shelter shed was gifted by a friend James when we attended a model rail exhibition last October. It is perfect for this location, made of metal and already painted. 
The two platforms have been connected by a wooden walkway so passengers can exit the location towards the houses, a mistaken direction the other way would certainly lead to death over the edge of the baseboard. (Reminder: Install fences). The platforms were coated with some coloured plaster I have had for years and look ideal to represent a tarred platform. There is a lot more scenery, namely fences, lights and plants to be installed here yet. The cork readily absorbs the paint and has a mottled finish rather than a plain finish of say styrene.
 
I chose the reddish ballast from a choice of leftover I have had from over the years. It is probably meant for N scale but I think works better than a course HO type. It is set in place but the tried and tested method of watering down with the spray bottle plus a few drops of detergent and then some watered down PVA glue. Sets like a rock and then this allows the initial track pins to be removed. (Ain't going nowhere). The rail edges were also painted, an essential in my book. No where in the real world is the side of the track 'silver'
The weeds are coming
I looked in my scenery draw and found some Mininatur foliage for in between and around the track that looked suitable. I am sure weeds were the last thing on the minds of the traction bosses when trying to run a company at a profit. My company is no different. So I pulled a chair up to the edge of the layout, music in the background, some tweezers and a dab of PVC and the planting commenced. Slow work but the end result came out OK. The edge of the cork will also be blended in with more weeds. At the moment I have only used the one type of weed but to add variety more varieties will be included. You don't just get the one type of weed in real life, (If only)


 The connection walkway between the platforms are representitive of an era when you knew to take care and lookout for yourself. There will be no heaps of warning signs, flashing lights etc to warn you, like today. I am modelling a back in the good old days era where you had some personal responsibility. (Also quicker to model) The shelter has been glued into place and some flowers have already started growing around the back.

 So some more work to be done around this area before overhead can be erected. I am happy how it has turned out. I placed a photo yesterday on the Facebook Traction Model Railroading site and it seems to have been well received. So I will keep going.
Not sure what will be on the next post or when, so keep checking, thanks for your interest. 

Thursday, November 13, 2025

Post #26

Although this blog is mainly about the construction of my traction layout, there are always distractions along the way.

I have been lucky to retain the friendship of school mates I went to school with over sixty years ago next year. We all have an interest in 'railways' and every few months or so we gather at each others places for an afternoon of rail activity, usually a model layout, maybe a rail video and always a lunch and afternoon tea and plus a drink or two.

Yesterday was Phils turn and he has a magnificent layout, I would call it finished but he always seem to find a spot to add more items to.

Also good news in that a few years ago Phil had submitted a proposal to have his layout included in the Australian Model Railway magazine. After not having heard anything from the editor, luck would have it that Phil bumped into the editor at the recent Rosehill Model rail exhibition and it now seems that the layout may feature sometime in the magazine during 2026. It is called the Northmeadow Lines, NSW based, so watch out for it next year.

I took a handfull of photos, the layout is so photogenic I could have taken hundreds but I will let the magazine show it all off.

Here is a handfull of photos I took yesterday:


Saturday, November 8, 2025

Post #25

 It's been over a month but the wheels have still been rolling, The track plan has been locked in now and its just a matter of getting down and installing the track. The easy bit is laying the flex track and then comes the hard bit of making the hand laid section. It's been well over 40+ years since I have hand laid my last track.

I'll come back and cover the track laying in another post. I actually got around to ordering some printed circuit sleepers for the track and points ( or ties and turnouts) but when laid for the first point I found that the sleeper thickness was slightly different in the two products. So I said to myself take a deep breath and move onto something else for a while.

So I looked for another time waster and I have quite a few plastic building kits to be assembled. Up one end of the board I have laid in a siding that can be served by both heavy rail and traction as there will be overhead to it. 


 The building is a Walthers kit as per photo. The box was fairly heavy and after opening there were many bags of various colour of plastic sprues. Your first thought is wow how long is this all going to take to put together.


It was just a matter of getting the instructions and start putting it all together. It is not a hard structure to make, just a lot of repetitive actions to do especially the windows. Part of the effort goes into removing the items from the sprues.

I decided the building would have a weathered, slightly run down appearance as opposed to the bright shiny new look out of the box. The first task was to locate the four sides and paint them with Tamiya Flat Earth colour. This immediately toned down the plastic red to a more real looking brownish brick colour. Then to make them stand out more all the window sills were then painted with Tamiya Desert Yellow. Both of these colours like bright and clean but them comes the weathering colour which is Tamiya Khaki Drab which is then diluted well down with some Isopryl Alcohol. This works a treat and work up from very diluted to more heavy ratio where a stronger aged appearance is required. You can see as soon as it is painted over the sills, they take on a weathered appearance. You can see the immediate change in the colour of the painted area in the photo below.

Another bonus of the building is that it will hold two point motors for adjacent trackage, sometimes it is easier to have top motored point motors.

The kit is very well produced for an injection plastic model, all parts fit as they should with out any filing, this compared with a few resin cottage industry buildings in the past that require much filing to fit. I would do an hour or so work each day on the building. There is no rush to finish and was easier to target a task for the day such as assemble the docks or do work on the windows.

 The roofs over the dock and rail dock were glued into place and then painted with Tamiya light grey. I then added some rust streaks on the roof. Some rust coloured chalk was scraped onto some wet Isopryl alcohol and let to dry. Like I said this building is old and decrepit. Side steps and railings were added. The roof had four skylights on it and were added. The plastic supplied for the roof was just a flat black piece so I added masking tape over it to add some texture and this was an improvement. Again to the rescue Tamiya flat black added to the roof and weathered up with the Tamiya Khaki drab. The roof has to remain removable so to allow access to the point motors.


 The next big job was to weather the windows and insert into the building. I wired all the windows together and then dunked them into the usual brown goopy mixture to make the job quicker. Once dry then came the insertion process. I still had the roof off at this stage to make it easier. It was then just a matter of sitting down at the desk and gluing them all in. And after they were in then came the glazing. So now the building is basically done, I may insert some floors into it unless the 'weathering' over the windows doesn't block out the view to the inside.


 So the building is basically finished, I might add some other details such as water down pipes and a few stickers. There are some that came with the kit. So this distraction from the track laying has been done. I basically wanted to refresh my ability to construct and weather up a building. And when the time is ready it will be secured down to the baseboard and this will allow the scenery to flow around the outside or a place for the weeds to take hold!